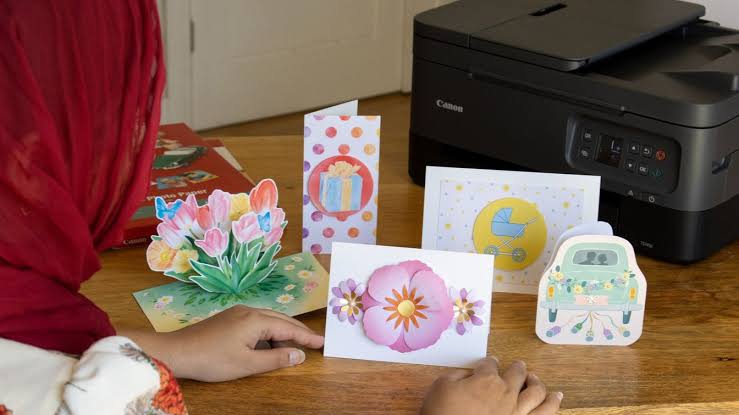
Greeting cards are news of the heart: an ancient method of spreading good news, bad news, pleasure, pain, closeness and distance. For birthdays, holidays, anniversaries and “thinking of you” notes, there is nothing like a personalized greeting card. Modern technology has made it so you’re no longer forced to purchase the same cookie-cutter cards at the store: You can design and print them out at home.
Print your own cards frets your cards budget and lets you be as individualistic as you want. This guide provides a step-by-step process that can help you create high-quality homemade print greeting cards.
Why Print Greeting Cards at Home?
Before we get into just how to do that, let’s get into why printing cards at home is such an awesome idea:
- Cost-Effective – Buying greeting cards store-bought can be costly, particularly if you require multiple cards in a year. They save money when you shall print your own.
- Customization – You have complete control over design, colors, text, and images, making every card different.
- Convenience – No need to visit a store. You can create and print greeting cards whenever required.
- Personalization – You could use your card for personal notes, inside jokes, or even photos.
- Eco-Friendly – Select recycled paper or cardstock for an eco-friendly option.
What You Need to Print Stunning Greeting Cards at Home
To make beautiful greeting cards, you will need some tools and supplies. Print greeting cards are often seen as more personal compared to digital messages, adding a tangible touch to your greetings.
1. Computer and Design Software
You can use software like:
- Canva – Free, user-friendly, and loaded with templates.
- Adobe Photoshop or Illustrator – Great for advanced customization.
- Microsoft Word or Publisher – Simple tools that still allow for creative designs.
2. High-Quality Printer
A good inkjet or laser printer allows you to print with vivid detail. Glossy and textured paper works best in inkjet printers, while a crisp and professional look is achieved with laser printers.
3. Cardstock or Specialty Paper
Regular printer paper won’t have the strong, professional look that you’re after for greeting cards. Instead, choose:
- Matte cardstock – An ideal choice for a classic, elegant look.
- Glossy cardstock – Provides a high-gloss, photo-like sheen.
- Textured paper – Adds a crafty, artistic quality.
4. Printer Ink or Toner
High-quality ink used avoids smudging and fading. If using a laser printer, make sure your toner cartridges have plenty of colorful ink.
5. Cutting Tools
- Paper trimmer – For clean, precise cuts.
- Scissors – Useful for decorative edges.
- Scoring tool – It makes sharp creases without harming the paper.
6. Envelopes
To finish off the professional style, pair your greeting cards with appropriately-sized envelopes.
Step-by-Step Guide to Printing Greeting Cards at Home
Step 1: Choose a Greeting Card Design
Decide on a theme before printing Build a design you professionally from scratch using software. Use templates from places like Canva or Adobe Spark. Design a card with their own photos.
Step 2: Set Up the Card Layout for Printing
Your card should be properly formatted for it to ensure it folds correctly. Here’s how.
- For a standard card – Set the page size to standard page (8.5” x 11” or A4) with two panels on the front and back.
- For a smaller card – Use 5” x 7” or 4” x 6” size.
- Double-check print settings – Select the option for duplex (double-sided) printing to ensure that both sides are printed correctly.
Step 3: Select the Right Printer Settings
TO RECEIVE the best results, adapt your printer options:
- Choose high-resolution printing (at least 300 DPI) for sharp images.
- Select the correct paper type (matte, glossy, or textured) in the printer settings.
- Adjust color settings to match your design’s vibrancy.
Step 4: Print a Test Page
Rhythm is important but make sure you print a test copy first to check whether everything is aligned and in the right colors etc. If needed:
- (Leave at least 1/4 inch margin to avoid cutting off important elements.)
- Boost colors if they look muted
- Confirm that the fold line is orientated the right way.
Step 5: Print Your Greeting Cards
The final step once the test print is just right is to print the final copies. Let the ink dry before touching the cards to avoid smudging.
Step 6: Cut and Fold the Cards
- Use a paper trimmer for straight edges.
- Score the center with a scoring tool before folding to avoid cracking the paper.
Step 7: Add Personal Touches
Add extra special touches to print greeting cards with:
- Handwritten notes – Write a personal message inside.
- Stickers or stamps – Add decorative elements.
- Embossing or foil accents – Give the card a premium feel.
Step 8: Pair with the Right Envelope
Choose an envelope that coordinates in size and style with the card. You could even decorate the envelope for extra charm.
Tips for Professional-Looking Greeting Cards
Taking blurry images will make the card look unprofessional. High-resolution picture and always use high-resolution picture. Using too many colors or patterns can be overwhelming. Light text on a dark background is easier to read. The right cardstock helps the presentation. Try out various paper types and printer settings to discover the ideal mix.
Final Thoughts
You can now design and create beautiful, high-quality, personalized print from the comfort of your own home. This not only provides a greater freedom of creativity but also gives a personal touch that commercial cards don’t provide. Your hand-made greeting cards will shine, whether for birthdays, holidays, or other experiences—unlikely to be forgotten.

